
🗄️ Sovereign Database (Baserow)
🗄️ Create your database with Baserow
Baserow is an open-source alternative to Airtable. Free online, hostable on your own server, it allows you to create visual databases without writing a single line of code.
1. 🌐 What is Baserow?
The difference between a spreadsheet and a database
You might already use Excel or Google Sheets. These are excellent tools, but they quickly reach their limits: files become heavy, formulas explode, and it's difficult to link information across several sheets.
Baserow is the spreadsheet that has gone professional. It allows you to:
- 📋 Store your data in easy-to-understand visual tables
- 🔗 Link information between different tables (equivalent to intelligently linked "tabs")
- 🤝 Collaborate in real-time with your team
- 🤖 Automate repetitive tasks through workflows and webhooks
- 🔌 Connect your data to external applications (Celestory, Zapier, Make…)

Why Baserow over Airtable?
| Airtable | Baserow |
|---|---|---|
Open-source | ❌ | ✅ |
Self-hosting | ❌ | ✅ |
Your data stays with you | ❌ | ✅ |
Free (basic version) | Limited | ✅ Unlimited when self-hosted |
Connection via API | ✅ | ✅ |
2. 🏗️ Fundamental Concepts (Baserow Vocabulary)
Before starting, here are the 5 concepts to know. Imagine an organization like "Russian dolls":
🏢 Workspace
 └── 🗄️ Database
      ├── 📋 Table "Customers"
      │    ├── 📄 Row (e.g., John Doe)
      │    └── 🏷️ Field (Name, Email, Phone...)
      ├── 📋 Table "Orders"
      └── 📋 Table "Products"
🏢 Workspace
The highest level. This is your "organization" in Baserow. You invite your collaborators and manage permissions here. You can have several Workspaces (e.g., one for your internal team, one for a client).
🗄️ Database
A project. Contains several linked tables. Example: a "HR Management" base with Employees, Leave, and Positions tables.
📋 Table
The equivalent of a tab in a spreadsheet. Each table contains information of the same type. Example: a Customers table, a Products table.
📄 Row (Record)
One row = one unique entry. In a Customers table, each row represents a specific customer. Each row has a unique identifier (Row ID) that Celestory uses to target it.
🏷️ Field (Column)
One field = one characteristic. Baserow offers over 25 field types:
- Text (single, long)
- Number and Currency
- Date / Time
- Email, URL, Phone
- Checkbox
- File / Image
- Link to table (to link data)
- Formula (automatic calculation)
- Single or Multiple Select (dropdown lists)

3. 🖥️ Test Baserow Online (Free)
Step 1: Create an Account
Go to baserow.io and click Get started for free. You can log in with your email address or via Google/GitHub.
Step 2: Create a Workspace
On your first login, Baserow invites you to create a Workspace. Give it an evocative name ("My Project", "Marketing Team"...).
Step 3: Create a First Database
In your Workspace, click "+ Add database". Name it freely.
Step 4: Create your First Table
Baserow automatically creates an empty table with some default columns (Name, Notes, Status, Assignee). You can rename them, add new ones, or delete them.
To add a field: Click the + at the top right of the table. Choose the field type (text, number, date…) and confirm.
To add a row: Click on the last row or the + at the bottom of the table.
Step 5: Link two Tables
This is where Baserow becomes truly powerful. For example, to link your Orders to your Customers:
- Go to your Orders table
- Click
+to add a field - Choose the type "Link to table"
- Select the Customers table
Each order can now be attached to a specific customer. Baserow automatically displays the customer's information in the orders table.
4. 👁️ Different Views: See your data differently
Baserow offers several ways to display the same data. All views access the same records; only the display changes.
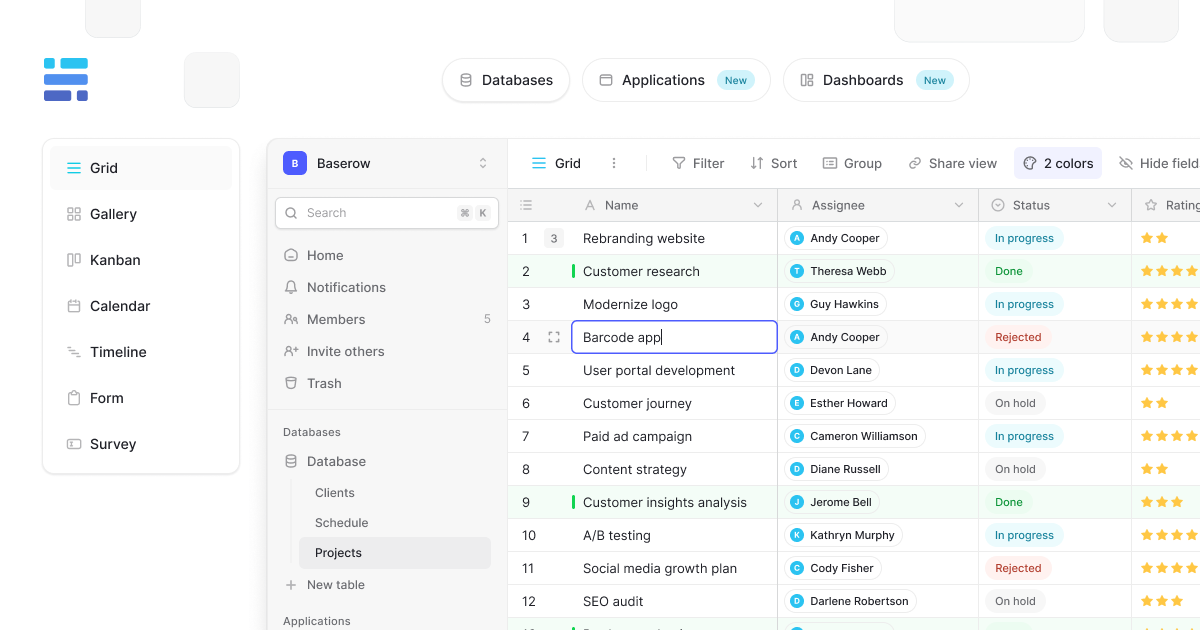
📊 Grid view
The default display, identical to a classic spreadsheet. Ideal for entering and inspecting data quickly.
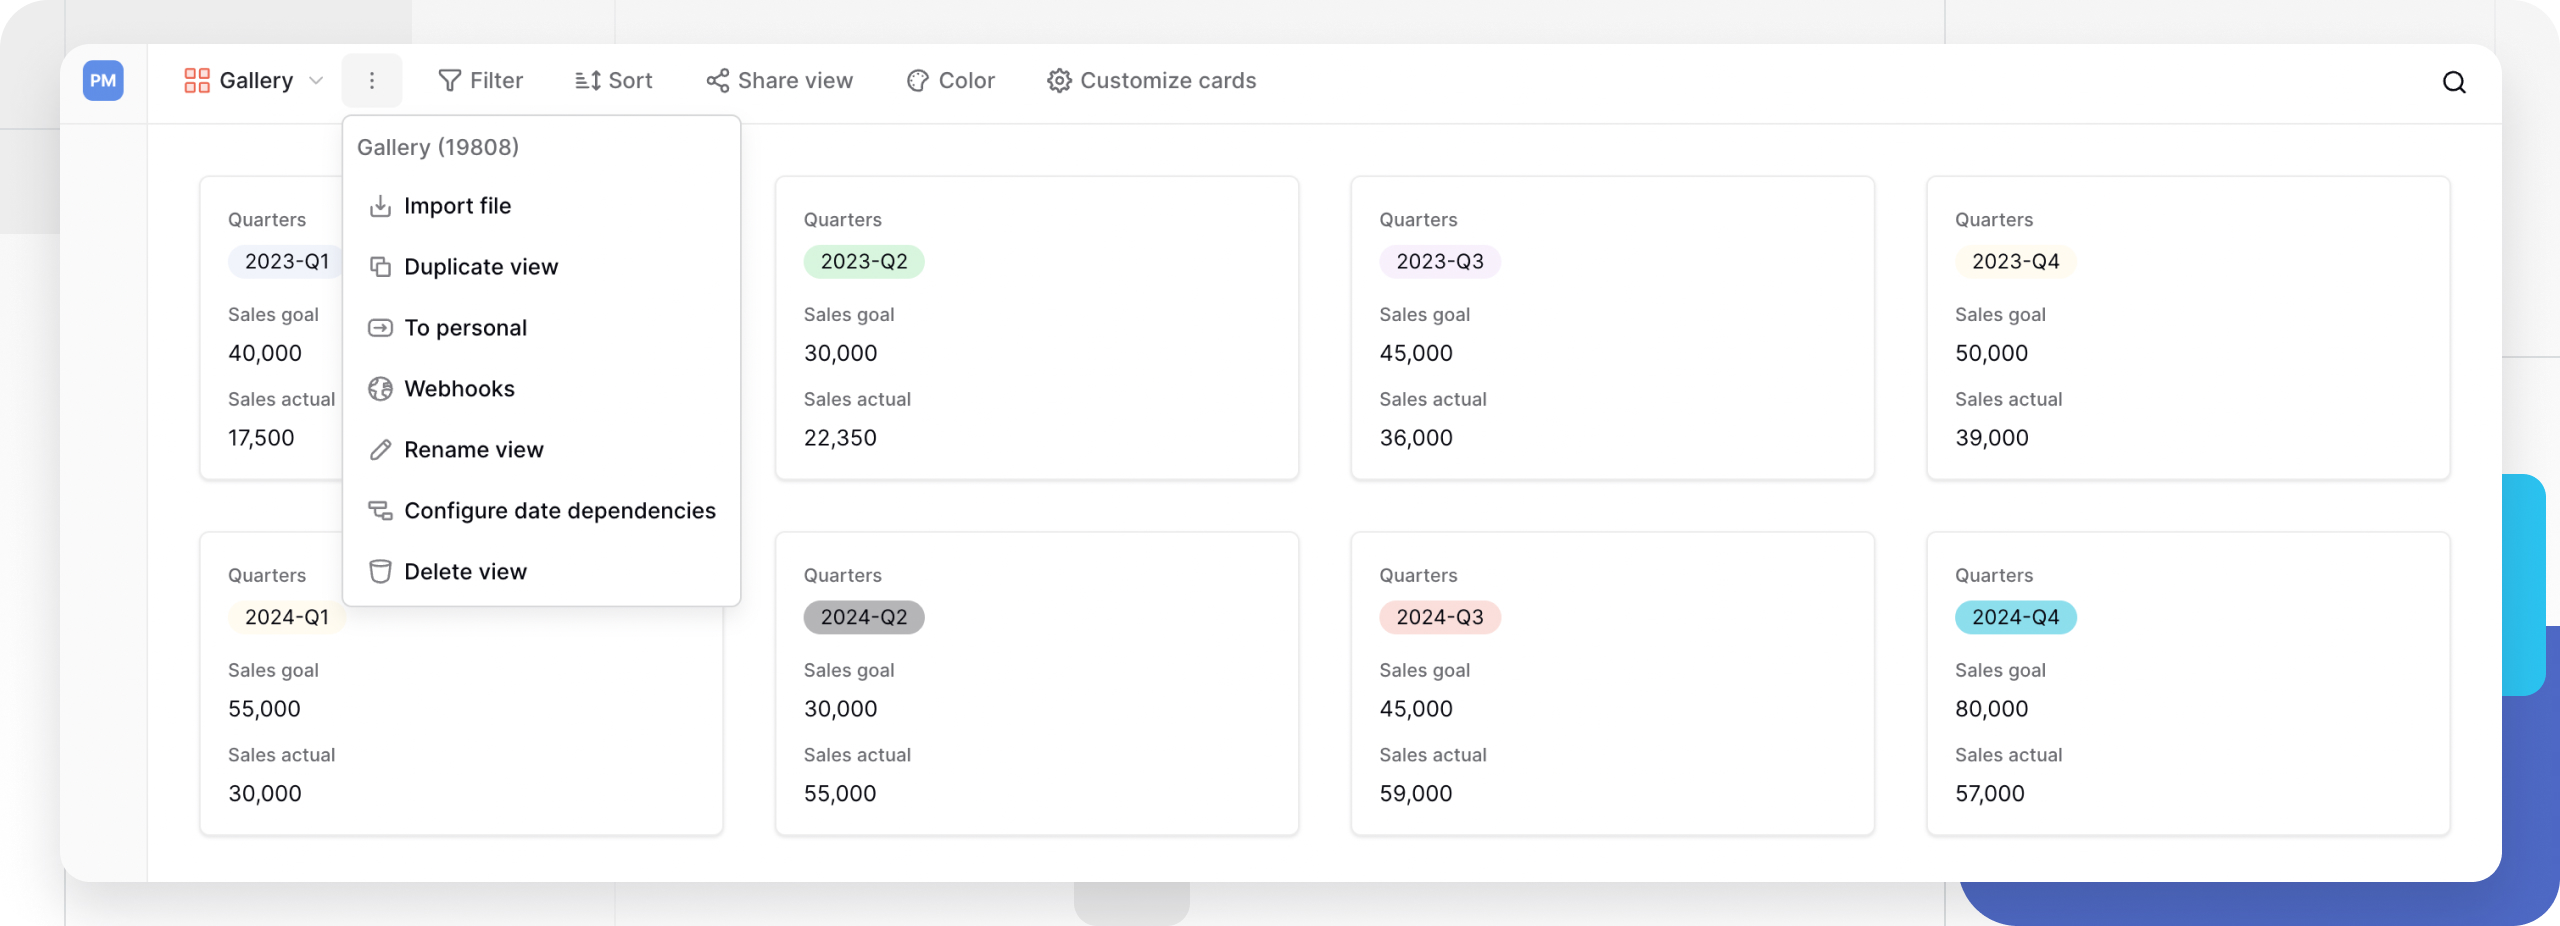
🖼️ Gallery view
Displays your rows as visual cards. Perfect if your records contain images (product catalog, portfolios…).

📝 Form view
Generates a public entry form. Share the link, and anyone can fill in data that will be added directly to your table. Ideal for sign-ups, feedbacks, orders…
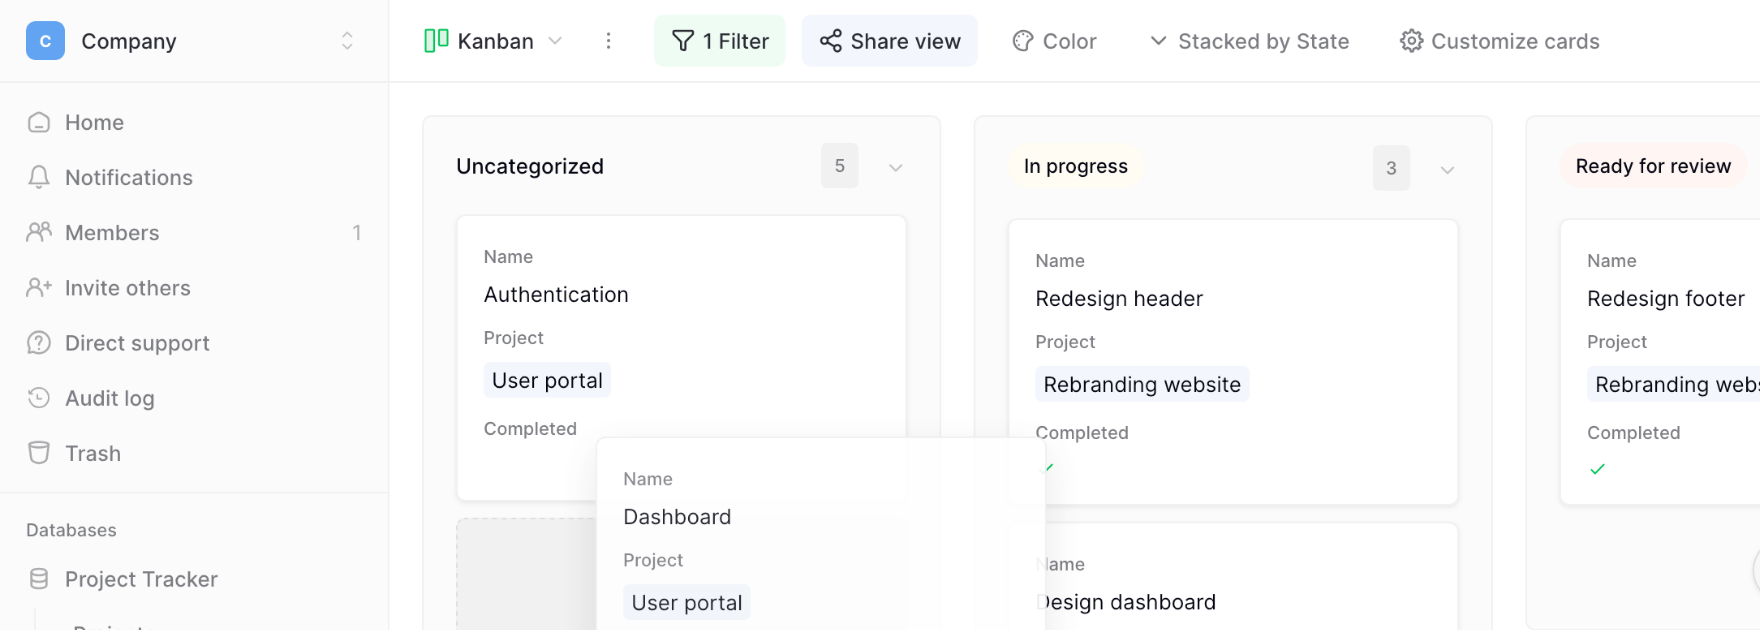
🗂️ Kanban view
Displays your data as columns of cards (like Trello). You drag cards from one column to another to change their status (e.g., "To do" → "In progress" → "Done").
📅 Calendar view
Positions your records on a calendar according to a Date field. Ideal for managing schedules, events, deadlines.
5. 🔒 Sovereign Baserow: Your data at home
Why it's important
When you use a service like Google Sheets or Airtable, your data is stored on the servers of an American company. You have no real control over your infrastructure.
With Baserow in self-hosted mode, you are the owner:
- 🔐 Your data stays on your infrastructure
- 🏛️ You easily comply with GDPR (data in Europe, or even on your own machine)
- 🌐 You can use it offline (in an isolated local network)
- 🔧 You customize and extend the tool according to your needs
Baserow Cloud vs. Self-Hosted
| ☁️ Baserow Cloud | 🖥️ Self-Hosted |
|---|---|---|
Hosting | Managed by Baserow | Managed by you |
Data | Baserow Servers | Your Servers |
Updates | Automatic | Manual |
Ideal for | Getting started quickly | Total control |
GDPR | Depends on Baserow | You are in control |
Periodic Trigger | Min. 15 minutes | Min. 1 minute |
Deploy Baserow with Docker (in one command)
Baserow is distributed via a Docker image, just like Celestory. If you have Docker installed on your server or local machine, one command is enough to start:
docker run -e BASEROW_PUBLIC_URL=http://localhost \
  -v baserow_data:/baserow/data \
  -p 80:80 -p 443:443 \
  --name baserow \
  baserow/baserow:latest
Baserow is then accessible from your browser at http://localhost.
🎯 Just like Celestory: Celestory offers the same sovereignty model — you can test on our cloud, then download the Docker image and host the application on your own infrastructure to keep total control over your data and tool.
6. 🤖 Automations in Baserow (Workflows)
Baserow includes a complete workflow automation engine. It's the equivalent of Zapier or Make, built directly into your database.
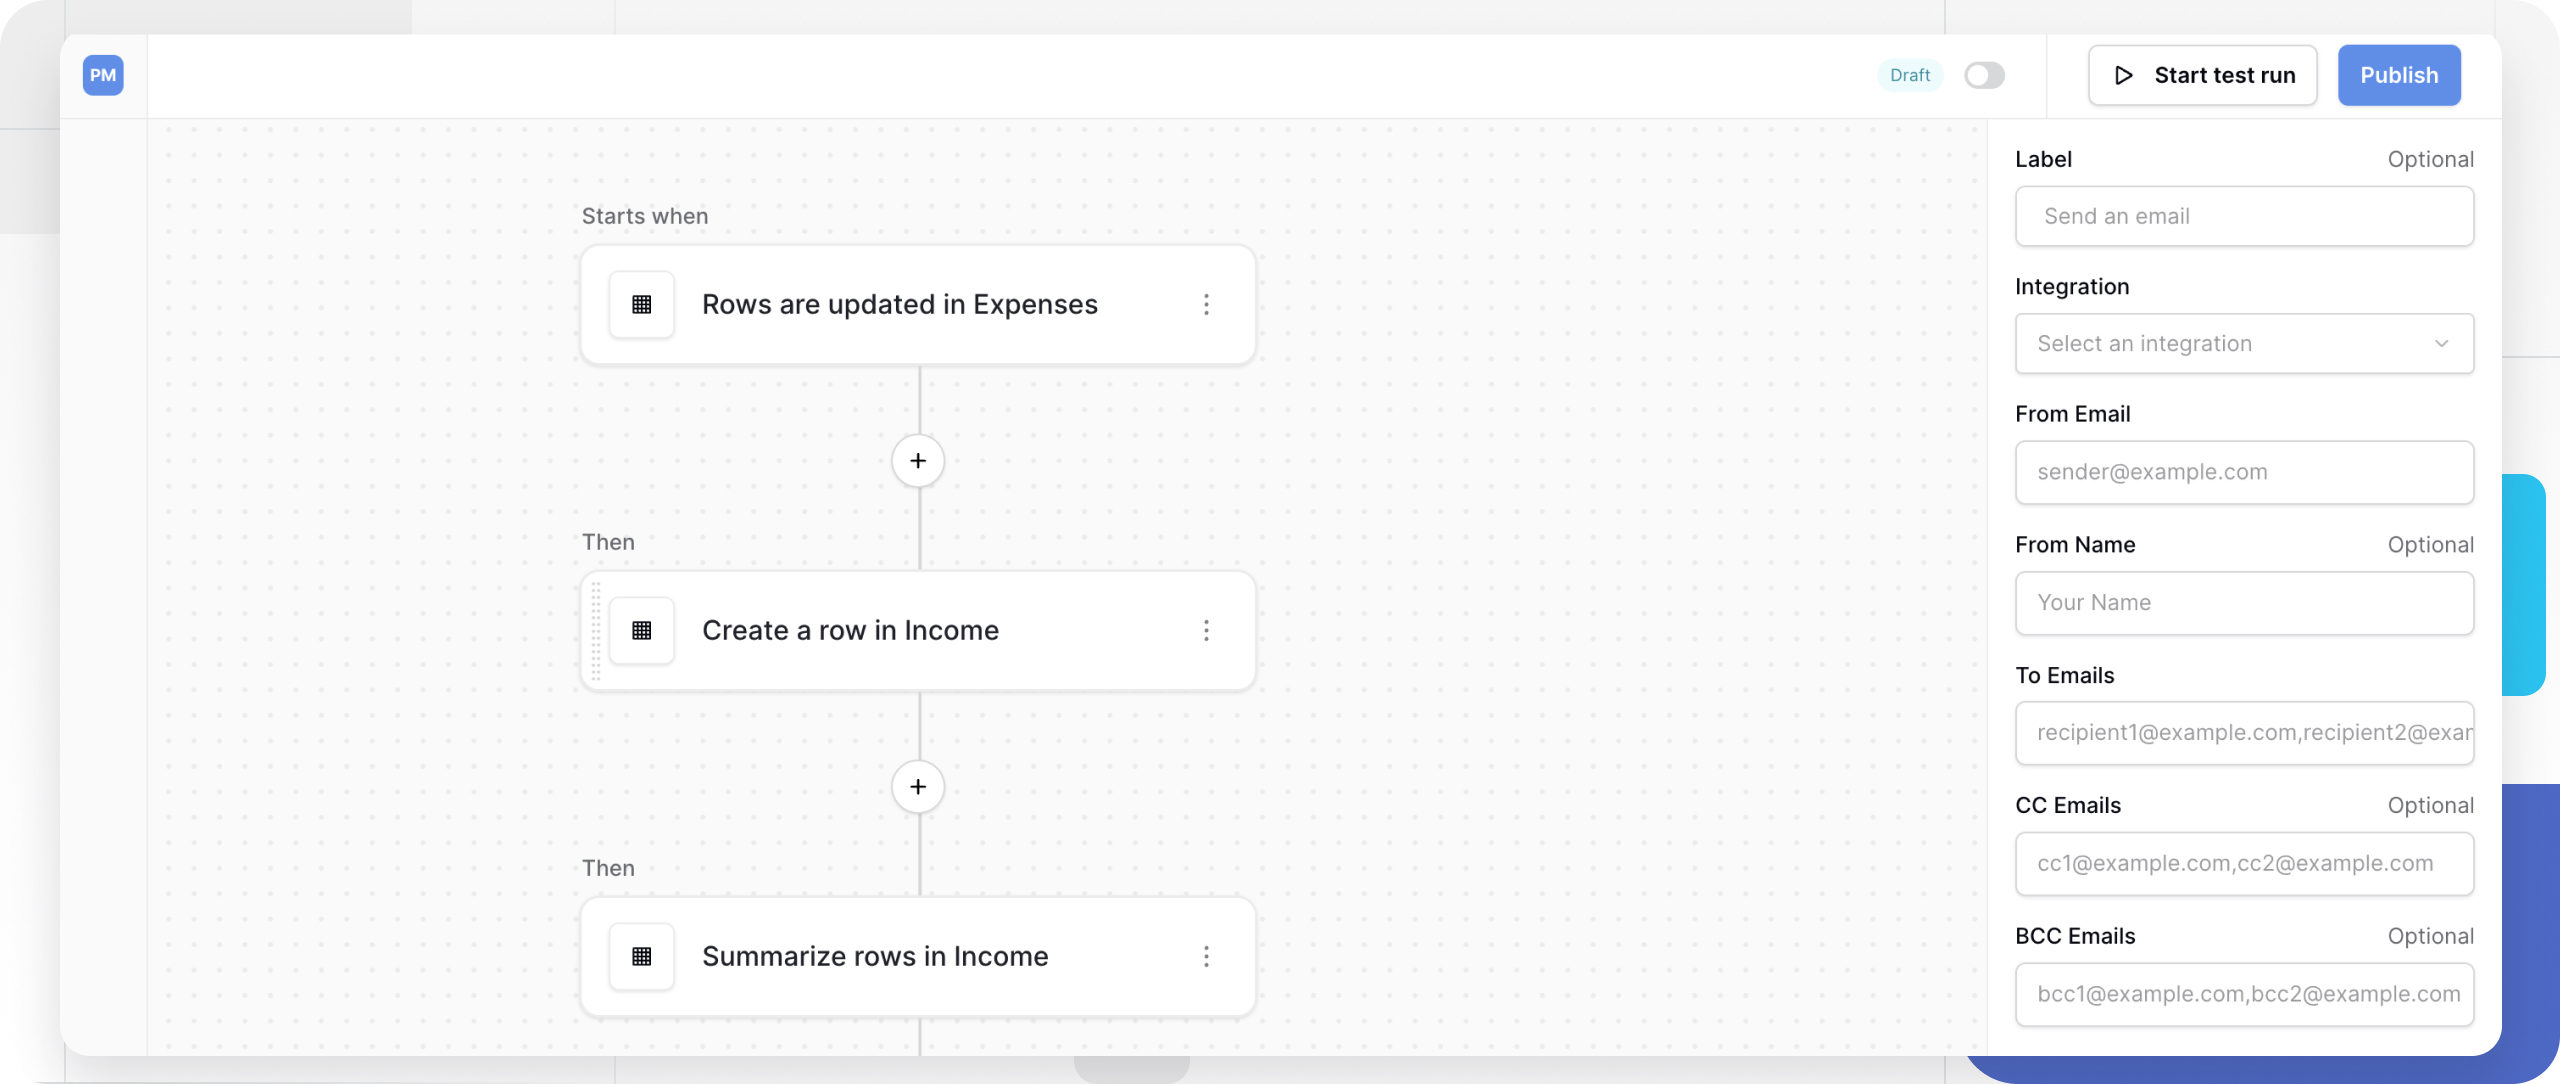
Structure of a workflow
Each workflow follows a simple trigger and action logic:
🎯 Trigger → ⚙️ Action 1 → ⚙️ Action 2 → ...
Example: As soon as a new customer is added (Trigger) → send an email (Action 1) → notify on Slack (Action 2).
⚠️ All new workflows start in Draft mode. They do not run until you have clicked Publish.
7. 🎯 Triggers and Actions: The heart of automation
Triggers
A trigger is the event that starts the workflow.
Category | Trigger | Description |
|---|---|---|
Table | Row created | Triggered as soon as a row is added (via form, API, or entry) |
Table | Row updated | Triggered when a row or a specific field is modified |
Table | Row deleted | Triggered when a row is deleted |
Time | Scheduled time | Scheduled trigger (e.g., every Monday at 9am) |
External | Webhook | Receives an HTTP request from Celestory or another tool |
Actions (What Baserow does)
Once the trigger is activated, actions follow sequentially.
Type | Action | Usage |
|---|---|---|
Data | Create a row | Automatically adds a row in another table |
Data | Update a row | Modifies fields of an existing row |
Data | Delete a row | Deletes a row |
Logic | Router | Conditional branching (If... Then...) |
Logic | Iterator | Loop to process a list of items |
Comms | Send an email | Sends an automatic email (via SMTP) |
Comms | Slack message | Sends a notification to a Slack channel |
Tech | HTTP Request | Calls an external API (Stripe, Celestory, etc.) |
AI | AI Prompt | Uses AI to summarize or classify data |
8. 🚀 Focus: Webhooks and Dynamic Creation
🌐 Using Inbound Webhooks
The Webhook trigger is essential for connecting Celestory to Baserow. It generates a unique URL. As soon as you send data to this URL (via an HTTP block in Celestory), your Baserow workflow starts instantly.
Configuration:
- Add the "Receive an HTTP request" trigger
- Baserow gives you a URL (e.g.,
https://baserow.io/api/automations/hook/XYZ) - Test it by sending a request. Baserow automatically detects the data structure (JSON).
📋 "Create a row" Action
This is the most common action. It allows you to transform received data (via Webhook or Form) into a structured entry in your base.
Workflow example:
- Trigger: Webhook received from Celestory (data:
name,email,message) - Action: Create a row in the "Support" table
- Configuration: You map the
Customer Namefield in Baserow with thenamevariable from the webhook.
9. 🔌 Connect Baserow to Celestory
Step 1: Retrieve your Baserow API Token
In Baserow, go to your account Settings (bottom left) → API Tokens → Click "+ Create token", name it (e.g., "Celestory") and copy the generated token.
Step 2: Find your table ID
In your Baserow table, check the URL in your browser: https://baserow.io/database/12345/table/67890/. Here, your Table ID is 67890.
Step 3: Configure Integration in Celestory
In Celestory, open the main menu → Integrations → Baserow and fill in:
- API Token: the token copied in step 1
- Instance URL:
https://api.baserow.io(cloud) or your Docker instance URL - SSE URL (optional): for real-time updates
Step 4: Use the Baserow Block in Celestory
Add the Baserow block in your graph.
Available Operations:
- Create: Add a new row
- Get: Retrieve a specific row via its ID
- Update: Modify a row
- Delete: Delete a row
- Search: Search for rows according to criteria
- UploadFile: Send a file (image, PDF) to a media field
10. 📖 Official Resources
- User Documentation: baserow.io/user-docs
- Automation Triggers: baserow.io/user-docs/automation-triggers
- Automation Actions: baserow.io/user-docs/automation-actions
- Docker Installation Guide: baserow.io/docs/index#installation
- Database Templates: baserow.io/templates
Updated on: 04/03/2026
Thank you!