
Updated for version 6.0.30
When you create a variable, you choose its type: text, number, date, image, list... This choice decides what the variable can hold and which visual editor you get afterwards. This article covers the type menu, what each type does, and the panel where you see and edit the value.
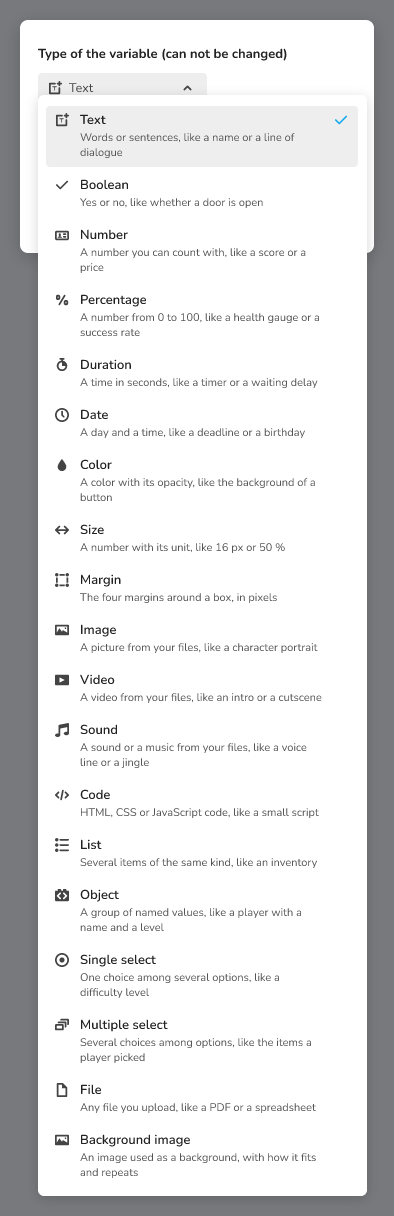 The "Add variable" window with the type menu open, showing the icons, the names and the one-line explanations
What it is for
A variable keeps a piece of information while the story runs: a first name, a score, a deadline, a difficulty level. The type prevents mistakes (you cannot put text in a number) and gives you a suitable editor: a calendar for a date, a gauge for a percentage, a player for a sound.
Where to find the type menu
- Open the project variables: the Variables entry of the project menu, or Cmd + Shift + V (Mac) or Ctrl + Shift + V (Windows, Linux). The window is called "Project variables".
- Click Add variable.
- In the window, open the Type of the variable (can not be changed) menu. Each entry shows an icon, the name of the type and a one-line explanation with an example.
- Choose the type, type the Name of the variable (can be changed), then click Add.
For a List, a second menu appears: Of (can not be changed). It asks for the type of the items ("Select list type").
💡 Tip: the Add button turns into "This variable already exists" when the name is taken. Choose another name.
The types, one by one
The menu lists them in this order. The second column repeats the explanation shown in the menu.
| Type | Explanation in the menu | What you see in the panel |
|---|---|---|
| Text | Words or sentences, like a name or a line of dialogue | A text editor, with a Format menu (Automatic, Text, Markdown, CSV, SVG, HTML, JSON) |
| Boolean | Yes or no, like whether a door is open | A Yes / No switch |
| Number | A number you can count with, like a score or a price | Buttons - and + (Shift moves by 10) and the Allow decimals option |
| Percentage | A number from 0 to 100, like a health gauge or a success rate | A gauge to click or drag, and a field |
| Duration | A time in seconds, like a timer or a waiting delay | Days, Hours, Minutes and Seconds fields, and usual durations |
| Date | A day and a time, like a deadline or a birthday | A calendar, the time and shortcuts |
| Color | A color with its opacity, like the background of a button | A color picker and a preview on a light and a dark background |
| Size | A number with its unit, like 16 px or 50 % | A number, its unit and a preview |
| Margin | The four margins around a box, in pixels | Four fields: Top, Right, Bottom, Left |
| Image | A picture from your files, like a character portrait | The drop area, then the preview with name, dimensions and weight |
| Video | A video from your files, like an intro or a cutscene | The drop area, then a playable preview |
| Sound | A sound or a music from your files, like a voice line or a jingle | A player (play, position, volume) |
| Code | HTML, CSS or JavaScript code, like a small script | An editor with a Language menu |
| List | Several items of the same kind, like an inventory | Numbered rows (the first index is 0) |
| Object | A group of named values, like a player with a name and a level | A form of values, with See as JSON |
| Single select | One choice among several options, like a difficulty level | Your options, and a preview for the player |
| Multiple select | Several choices among options, like the items a player picked | Your options to check, and a preview for the player |
| File | Any file you upload, like a PDF or a spreadsheet | The drop area, with a direct preview of images, PDFs, sounds, videos, texts and tables |
| Background image | An image used as a background, with how it fits and repeats | A preview that follows every setting |
🔺 Note: the Border image and Text style types belong to the project styles and do not appear in this menu.
The new types at a glance
- Date: a precise moment, with its calculation blocks (Dates: the Date variable and the date blocks);
- Single select and Multiple select: a closed list of options (Single select and multiple select variables);
- Percentage and Duration: a gauge and a countdown (Percentage and Duration variables);
- Video and Sound: a media file picked from the project files (Video and Sound variables).
The visual panel
Once the variable is created, select it in the list: on the right you see its name, its type and, below, its starting value ("Starting value of the variable when the graph starts").
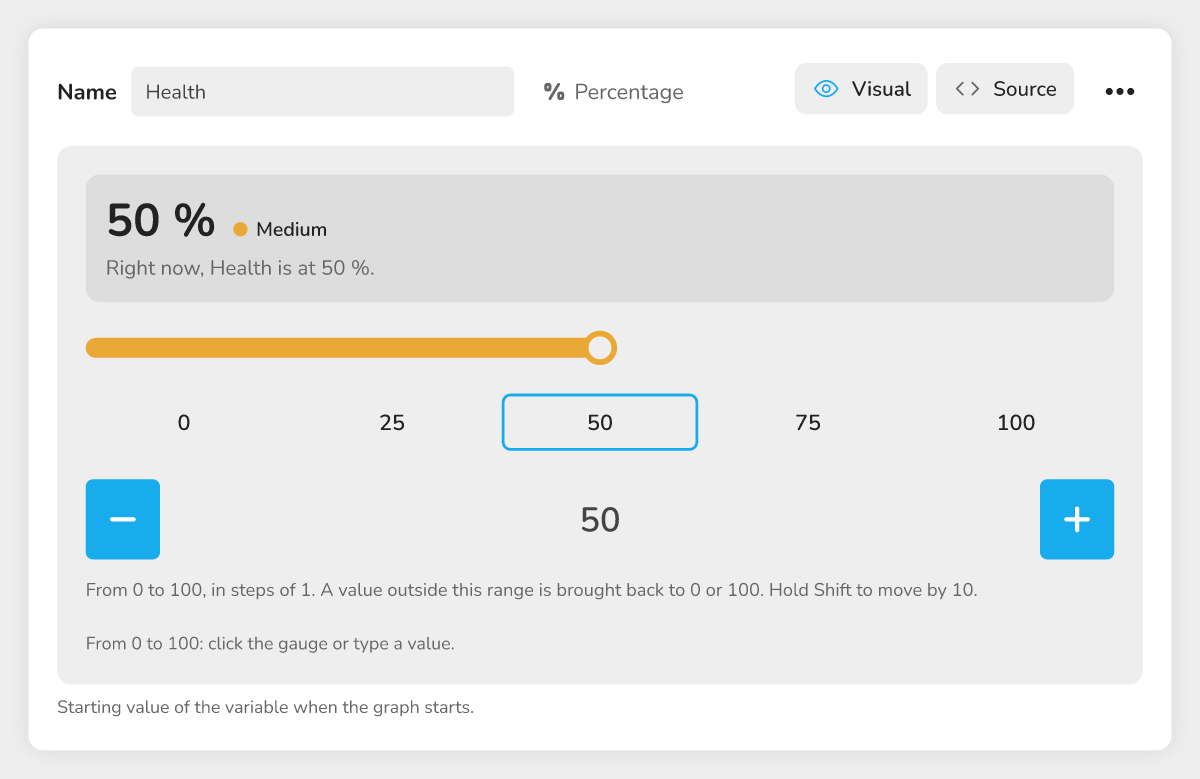 A Percentage variable selected, with the name, the type, the Visual / Source switch and the gauge.
A switch offers two views:
- Visual: the editor of the type (calendar, gauge, player...), where the value changes live;
- Source: the value as it is stored. For a Text or a Code, it is the text or the code itself, which you edit directly. For an Object, a Color, a Size and a Margin, you can edit it as JSON, then click Apply. For the other types, the "Technical value" is read only: change it in Visual.
The last view you chose is kept for each type, in this browser.
A variable with no value first shows "Create the starting value of this variable: you can then change it here, live." and a button (Add a number, Add a date, Add a duration...). Click it to create the default value of the type.
On a small screen
On a narrow screen (768 pixels or less), the list of variables and the editor are shown one after the other: choose a variable, then use the Back button to return to the list.
Changing the type
The type cannot be changed after creation: hover over the type, the tooltip says "The type of a variable cannot be changed". The name can still be edited. To change the type, create a new variable of the right type, copy the value over, replace the old one in your blocks, then delete it.
Limits
A List cannot hold items of type Date, Video, Sound, Duration, Color, Code, Size or Margin: these types do not appear in the "Select list type" menu.