
Updated for version 6.0.30
To explain a graph to your team, you can now put arrows, frames, sticky notes and numbered steps right on it, without touching the story. These annotations are for commenting, dividing and documenting: the player never sees them.
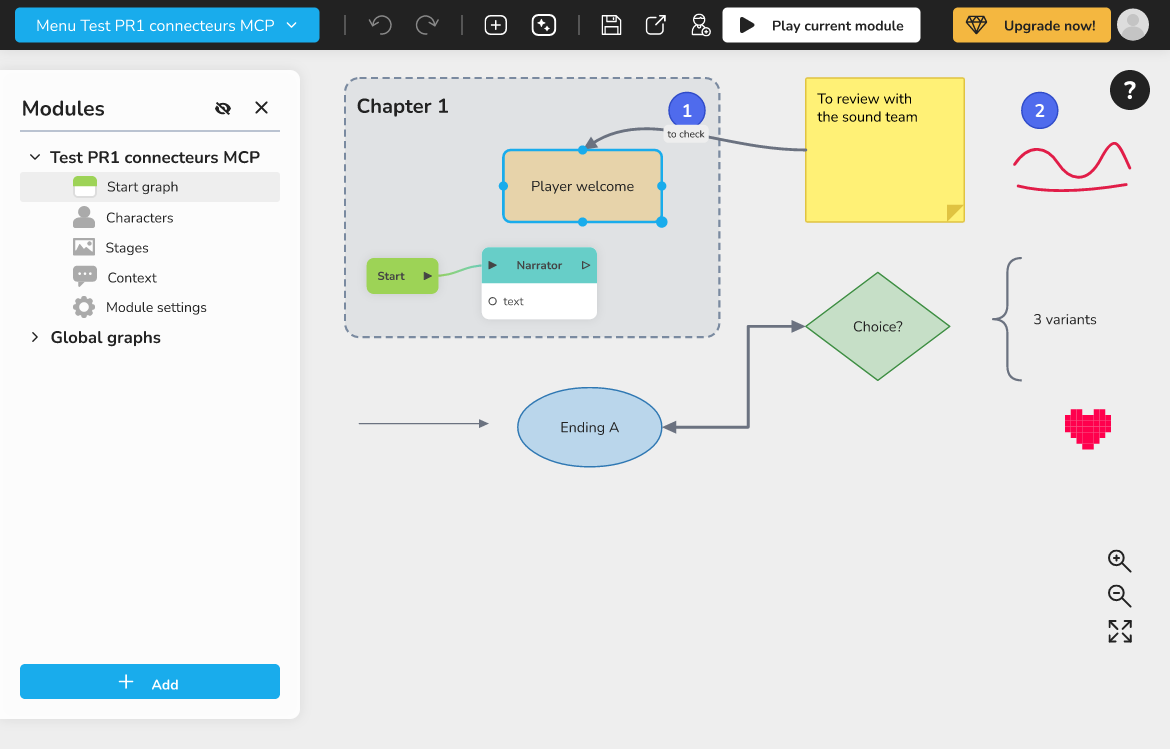 an annotated graph, with a titled section frame, a yellow sticky note, a numbered step "1" and an arrow linking two blocks
What shapes are for
A shape is not a block. It is drawn behind the blocks (shapes under groups, arrows under blocks) and it is not included in the build or in exports: the published game, the debugger and the translations do not see it.
For example, you can:
- wrap a chapter in a Section frame and give it a title;
- add a Sticky note to leave an instruction for a colleague;
- number the main stages of a path with Numbered step badges;
- link blocks or shapes with an Arrow to show a sequence.
Where to find shapes
Right-click an empty area of the graph. The menu offers, in this order: Add block, Comment, Shapes. Click Shapes: the list of shapes opens, and the new shape is placed where you clicked (snapped to the grid).
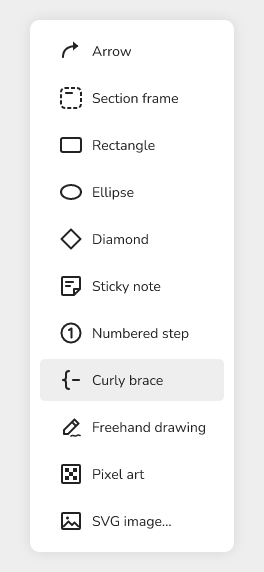 the right-click menu on the graph, with the "Shapes" entry and its list open
🔺 Note: this entry used to be called "Annotations". If you are looking for "Comment", that is a real block of the graph: see ⬜ Comment.
Available shapes
| Shape | What you get |
|---|---|
| Arrow | A loose 250-pixel arrow, ready to be attached |
| Section frame | A frame with a title ("Section" by default) |
| Rectangle | A rectangle with text in the middle |
| Ellipse | An ellipse with text in the middle |
| Diamond | A diamond with text in the middle, handy for a question |
| Sticky note | A yellow note, text starting at the top left corner |
| Numbered step | A numbered badge (the next number is suggested) |
| Curly brace | A brace to group several elements |
The list also offers Freehand drawing, Pixel art and SVG image…: they are covered in Drawing on the graph: freehand, pixel art and SVG images.
A shape can be moved and resized like a block. It cannot be smaller than 100 by 75 (50 by 50 for a numbered step).
Linking with arrows
An arrow can start from a block or a shape and end on a block or a shape. There are two ways to link it.
Drag the ends
- Add an Arrow: it appears loose, attached to nothing.
- Drag one of its ends (the Anchor point: drag to link) onto a block or a shape.
- Do the same with the other end.
Use "Link to…"
- Right-click a block or a shape.
- Choose Link to….
- Click the block or shape to link to. A message reminds you: "Click the block or shape to link to. Esc to cancel."
An arrow follows its blocks when you move them. If you delete a block or a shape, the arrows attached to it are deleted with it, in the same action: a single undo brings them back.
Reverse the direction
Right-click the arrow and choose Reverse the arrow.
Editing a shape
Right-click the shape or the arrow, then choose Edit the annotation. An editing window opens.
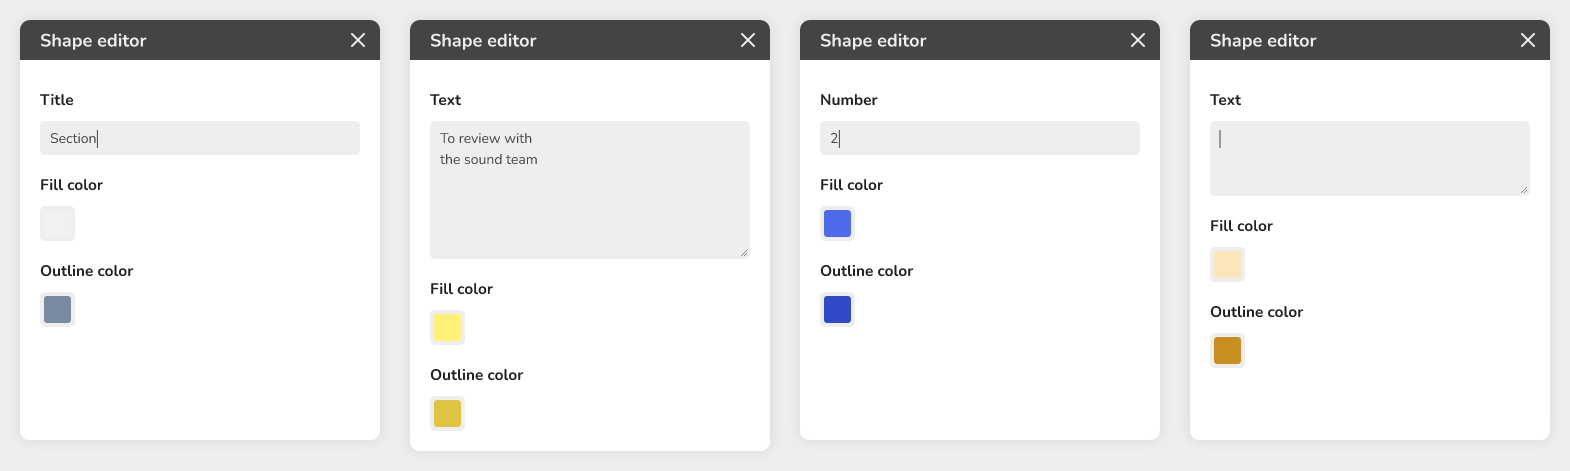 the "Shape editor" window of a sticky note, showing Text, Fill color and Outline color
For an arrow ("Arrow editor"):
- Label: a short text on the arrow;
- Line: Straight, Curved or Elbow;
- Heads: One head or Two heads;
- Thickness: Thin, Medium or Thick;
- Color.
For a shape ("Shape editor"):
- Text, or Title for a section frame, or Number for a numbered step;
- Fill color;
- Outline color.
Let the AI assistant annotate the graph
The AI assistant in Graph mode can add, link and remove arrows and shapes (frames, sticky notes, steps, drawings). For example, ask: "Wrap the introduction in a frame titled Start and number the three steps". See The AI assistant that builds your graph.
Good to know
- Shapes are not blocks: they do not count in block statistics, and the debugger does not check them.
- When you move a group of blocks, the shapes inside its frame follow it, and so do the arrows attached to its blocks.
- A graph created before this feature opens normally, with no shapes.